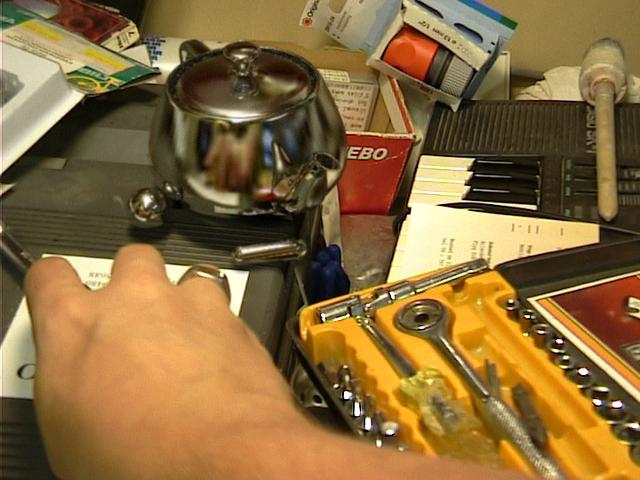
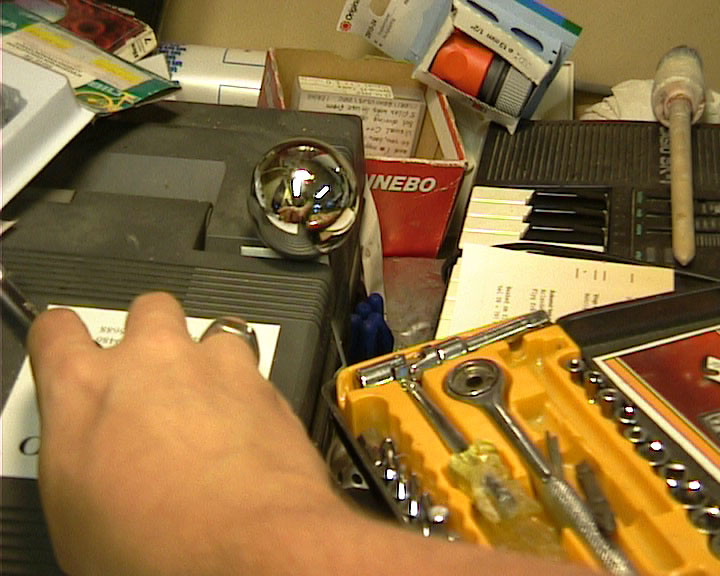
This is our background plate (click for full resolution pic). The "chrome sphere" in this case is simply a simple plstic christmas ornament, and the frame is shot w. a Canon MV30i video camera, in a messy garage :) and the shot is actually part of the robot-creation sequence from Kid Wars, my star wars fanfilm. In this case we use the image as-is, since our CGI will be on top of the sphere, but one could easily have edited together an empty plate where the sphere was not present to use as a background.
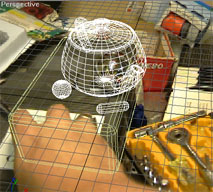
You can probably do a much better model yourself.
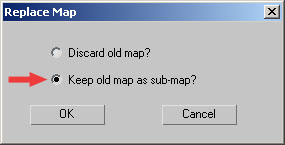
In the dialog that pops up:
 Black objects, but with a shadow. So far, so good... Now the fun bit In your material, scroll down to the "Maps" rollout, and click the "Reflection" map entry. In the dialog that pops up, choose "Chrome Map".
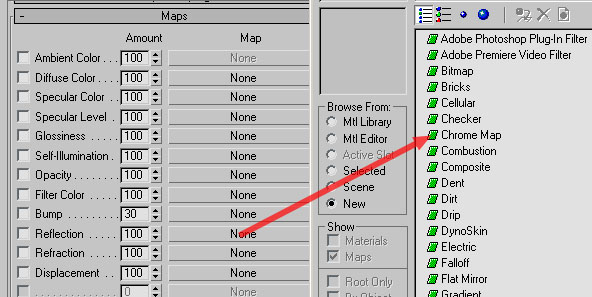 Clicket yee "Chrome Map" But the Chrome Map is no good in itself... it is just a magical transformation matrix provider. You still need something (a photo of a ball) to actually "relect". So in the "Chrome Map" rollout that just appeared, click the "None" button, and pick "Bitmap":
 Select a Bitmap to reflect Now, in the Bitmap file dialog select our background plate again! (Yes, we are lazy, we use the same map). But the Chrome Map must be an image of a sphere, nothing more, nothing less. To do that, we use the "Crop" option in the Bitmap:
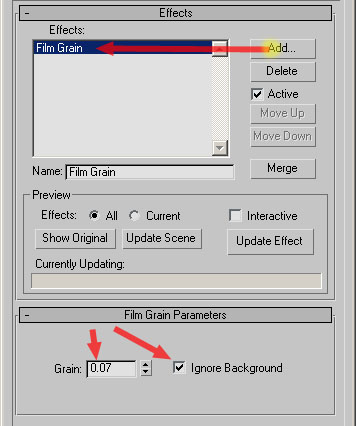
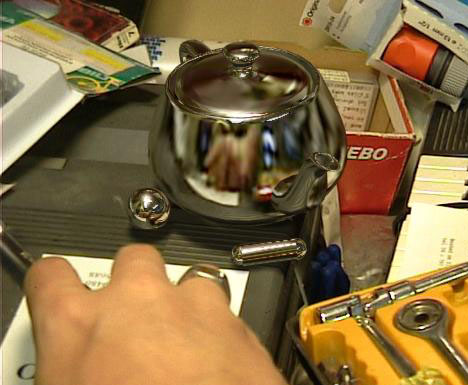 Not too shabby, huh? You see the reflection of the hand in the teapot! Now the poor quality of the original photo starts to rear it's ugly head (The better photo you have, the merrier, as they say) but we can try to do something about this. Go into "Coordinates" rollout on the Bitmap and change the blurriness:
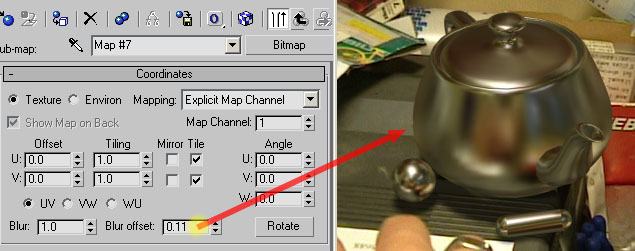 A little blur, and we have a brushed metal teapot There is still some more steps towards "full" realism. As all reflection-maps you do not get any self-reflection on this object. Lets do something about that. First, turn the blur back down so it's only slightly blurry. Then go up to the "Chrome Map" level by clicking the little "Up" arrow, and then click on the button that reads "Chrome Map", and select "RayTrace" instead:
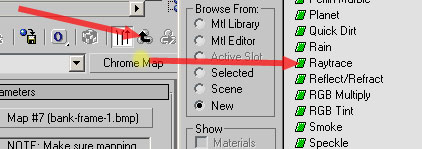 Lets RayTrace instead...
If you render the image again, you will get something like the below:
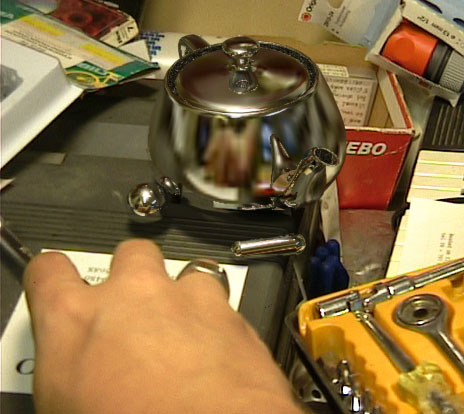 Self reflecting teapot (the spout is reflected in the body) but still reflecting the environment - nifty!
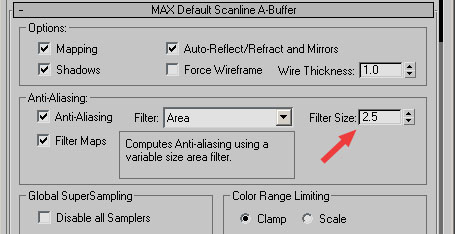 Area filter, 2.5 pixels, to match backgrounds blurriness
You can get the MAX file for this scene here, and it needs this map. Now for the good part... everything we done so far is technically doable without help of other tools than the Chrome Mapping plugin, but with varying degrees of extra work needed to convert the "image of a sphere" into something usable as a reflection map. But with the "Chrome Mapping" plugin, its a one step process. And this allows us to use video as our map. If you videotape your chrome sphere while things around it move, these reflections will look very accurate when mapped onto an object using same video to composit with. For an example of this, watch "Kid Wars", the robot building sequence. Of course nothing forces you to do everything bright and shiny. You can use this reflection map as any other reflection map, only for spice e.t.c. Also, blurring it A LOT (way beyond the level we did on the "brushed metal teapot") actually makes it an interesting base for lighting. (The robot building sequence in "Kid Wars" HAS no lighting at all, beyond chrome mapping, raytracing, and "light/shadow" falloff maps). Beyond this, only your imagination is the limit: 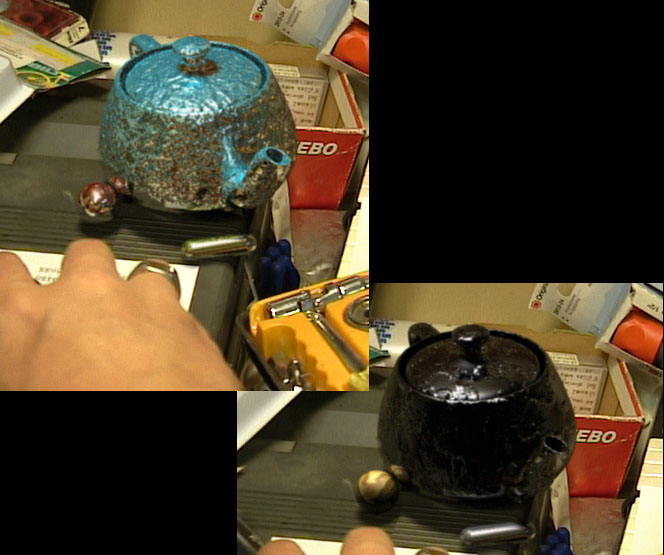 Your imagination is the limit. Mine didn't stretch further than this...
<== back to "Chrome Mapping" plugin page |
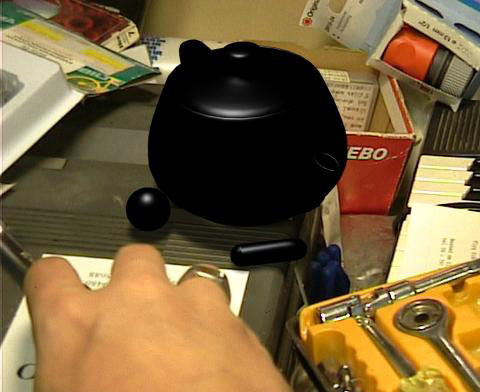
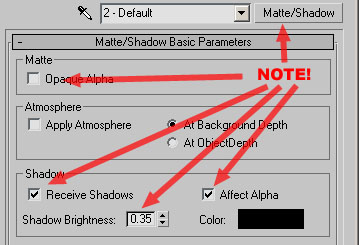 Before we move on to the actual Chrome Mapping, lets make our base image somewhat prettier by modifying the material for the chamfer box. Go into the material editor, pick a slot, and click the "Standard" button and instead choose "Matte/Shadow" material.
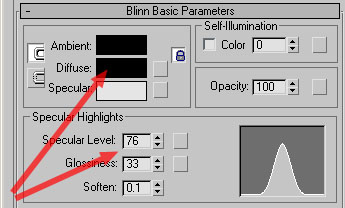
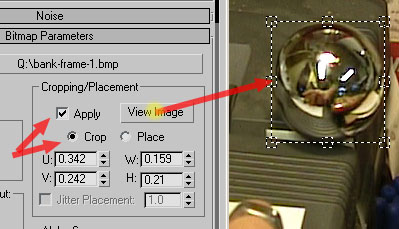 In the "Bitmap Parameters" rollout:
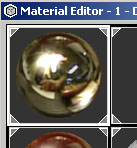 When you have done this, you SHOULD see, in the material editor, that the "demo sphere" bears a remarkable, uncanny similarity to the sphere from the image! In fact, it should be borderline identical, safe for the slight extra specular highlight! If you now render the image we have so far, you will get something like this: