 - matrix style intro -
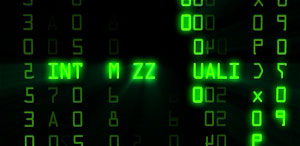
Done 100% in After Effects with the help of 3D layers. I made one composition of random numbers (using the "Numbers" text effect with various settings for Random numbers in a fixed width font. In the middle I wrote "Intermezzo Dualis".
I then created a comp of a falling gradient ramp, and then filled a second comp with copies of this comp ones for each column. By moving each layer around on the timeline I staggered them timewise so the gradients would fall in a semi-random-looking sequence.
I combined the two comps in another comp with "Multiply" so the brightness of the falling gradient would dictate the brightness of each letter. I also added in special bright squares over each letter in the "intermezzo..." text at the time the gradient "fell" past this letter to "light it up". The whole completed comp was put in a 3D layer in yet another comp, and the camera animated across it, and Trapcode's "Shine" plugin was used to create the beams-of-light effect and the Stylize/Glow effect to give some shine.
The AE file is here on popular demand. Needs "OCR A Extended" font and Trapcode's "SHINE" Plugin!
 - intro scroll -
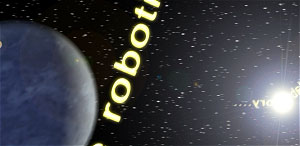
The intro Scroll is fairly simple, albeit unorthodox from a "Star Wars" perspective. It's created in 3D Studio using text with a PathDeform modifier on to make the text follow a spline. The camera is just roughly animated to follow it and then pan towards the planet. One interesting aspect of this animation is the motion blur on the stars... to get the correct streaking look on the blur I used my own motion blur plug-in (to be marketed later) which preserves superbright spots in the image and streaks them out accordingly. Interestingly, I found that you cannot have superbright spots on an environment map (they get clamped to white) so to be able to see the effect I actually had to create a huge sphere and apply the superbright star texture to the inside of the sphere. The stars were created with the simple "noise" trick mentioned in the Max manual, i.e. use the "Noise" texture map and set lower limit to 0.65 and high to 0.7 or thereabouts.
 - lab pan down -
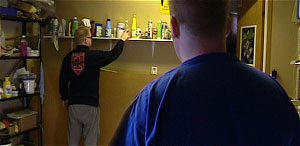
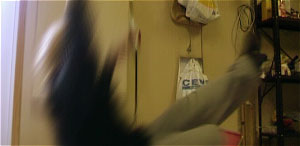
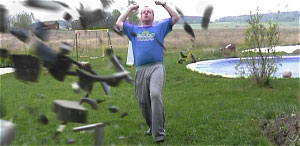
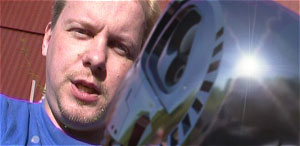
One of the latest completed shots of the film. The basic idea just hit me one day and I simply HAD to try it... so I used it as an intro for this film.
The basic idea is this... have you ever seen these helicopter footage of a tall building, mountain top, or similar where the helicopter circles the object? Looks cool huh? The important aspect of such a shot is that you will see an object in the middle of the picture that is "still" (although you are flying around it) and in the background you will see the distant objects (cityscape, other mountains, or such) whipping past in a blur... since the object being filmed is so tall and close to the camera in relation to the background, you have really no detailed "perspective connection" between the tower/mountain top/whatever and the background whipping past.
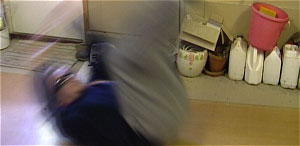
So I figured that you couldn't really tell the difference between REAL background shot from say a helicopter flying in a circle and simply rotating the camera around from a stationary spot, if what you are filming is all fairly far away... i.e. the camera filming the background doesn't really have to travel in an actual circle to get a background that will whip past the frame in the right manner. Putting an obect in the center of this background would be perceived as "flying around" a tower or other high object.
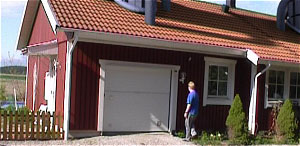
Armed with this basic idea, I shot my background. By climbing up on the roof of I shot a smooth pan of the distant horizon (I live in a comparatively flat area and you see pretty far by simply being on top of a normal 1 story roof). I ended my pan in a slow stop pointing towards the clouds.
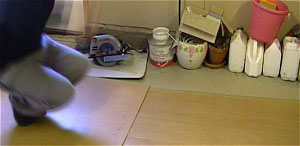
I also wanted to try to get my pan to go all the way to the ground so I then I climbed down off the roof and shot a tripod based pan from pointing at the house front and garage door panning up to roughly the same angle. Then I tried to join these clips...
Problem was, I made a poor attempt first time, and had to do everything again. Unfortunatly the clip from going up on the roof the second time had a tape dropout in the middle, but the pan from the ground was much better the second time... so I had to use the ground clip from attempt #2 and the rooftop clip from attempt #1... but I had aimed at different clouds each time and a slightly different angle. But rather than putting that (#¤/&#¤ ladder up AGAIN I just used what I had. You can see the raw clip here. As you see in this clip it is pretty evident where the changeover is and that the angles aren't really matching that well, and also that the whole thing was actually filmed backwards compared to what it appears in the movie.
Next I loaded my joined clip into the formerly-free-but-now-no-longer-available camera tracking app "Icarus". I tracked it in "Pan Zoom Tilt" mode, which means Icarus assumes the camera is stationary in position and only swivels and tilts. (These trackings tend to go much faster and be way way more accurate). Icarus was a bit confused by the crossfade but mostly generated a sensible camera that panned around to follow the background panning that could be exported to 3D Studio.
But of course, this camera didnt make physical sense yet... it was just doing rotations... any 3D object added based on this camera tracking would work okay on the first bit where I pan off the house, but it would no longer make any sense as the pan continued and after the crossfade.
So I parented my camera to a dummy object which I could animate. For the first bit, while the house is still in actual view, I held the dummy object still, so the camera, which made complete sense in these frames, would match well.
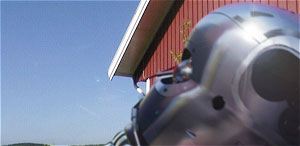
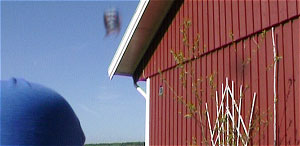
But as soon as no part of the house was in view any longer I started to move my dummy object (and the camera would follow, being parented to it, but retain it's old animation relative to the dummy object). First I moved it upwards to try to get a feelign of lifting off the ground (remember this all was done backwards to how the intro actually is in the film, and there was a while where I was considering using it as an outro instead, btw) and then when the horizon came back into view after the crossfade, I tried to turn the it to fix the angle discrepancy between the background takes. I also started to move the dummy (and with it, the camera) in a circle around a fixed point so the camera (who was turning around based on the animation created by Icarus) was always aiming at a center point instead of being located at a fixed point and just panning as the raw data from Icarus would have it.
The 3D model itself is nothing special; I even threw in an Escape pod model in the middle because frankly the crap I had as middle section (a cone with the "Greeeble" modifier on) sucked royally. What is a bit special with it is that all the lighting and the reflection on it (with the exception of a single directed light for the sun) is all done based on my Chrome mapping and Occlusion mapping plugins, and are all based off of pictures of a chrome sphere I shot up on the roof... so if you look carefully in the reflecting stuff you can really see the sky and the trees and even parts of the roof reflecting in them.
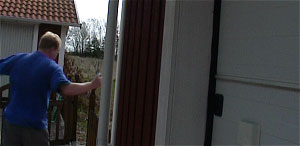
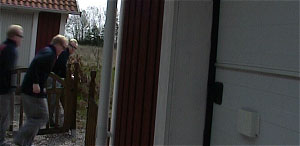
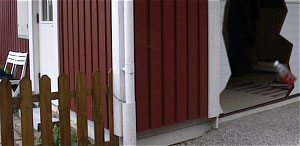
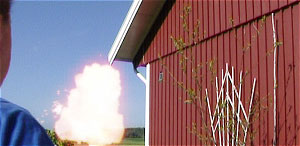
 Finally, I used the first bit of the camera data from Icarus (again, remember we are working backwards compared to whats
in the movie) and put this into After Effects. In AE I dropped in a layer of myself walking towards the garage door and
"opening" it, plus a separate shot of the closed garage door to be added in. Since this section of the camera track
was a pure pan/tilt operation, a 3D layer in after effects matches perfectly the camera panning (See
separate explanation for why).
Finally, I used the first bit of the camera data from Icarus (again, remember we are working backwards compared to whats
in the movie) and put this into After Effects. In AE I dropped in a layer of myself walking towards the garage door and
"opening" it, plus a separate shot of the closed garage door to be added in. Since this section of the camera track
was a pure pan/tilt operation, a 3D layer in after effects matches perfectly the camera panning (See
separate explanation for why).
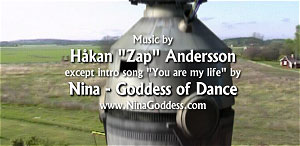
Soundwise, I chose to use music from my dear wife, Nina - Goddess of Dance, instead of the tired old John Williams score for several reasons... one being copyright, of course, but another being the fact that I found it more captivating as intro.
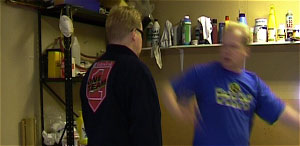
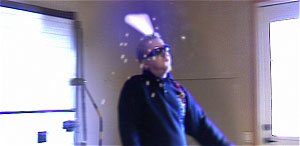
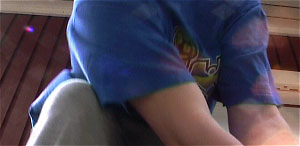
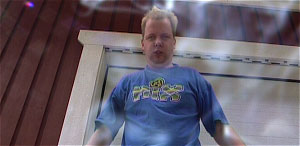
 -- In-garage Clone shots --
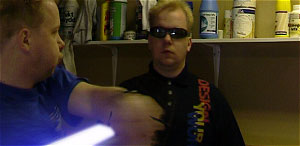
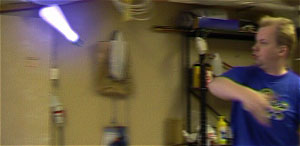
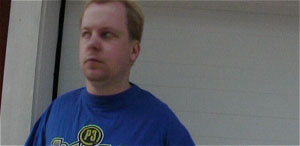
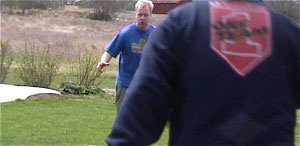
I enter frame right and myself is standing frame left. Not exactly a rocket-science effect to pull off.. just shoot twice with different clothes, add the layers on top of eachother, and an mask for the top layer (the "good" me with the blue t-shirt).
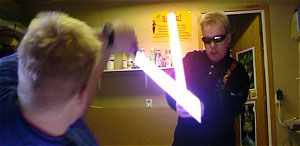
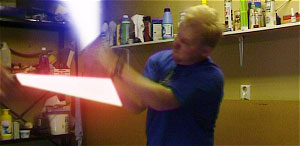
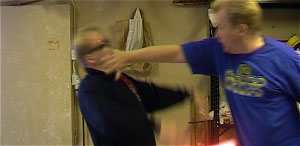
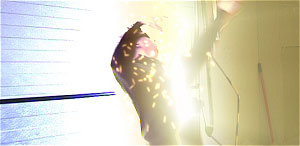
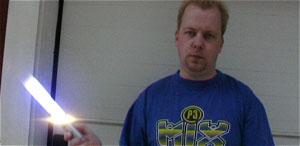
 - Lightsaber Ignition -
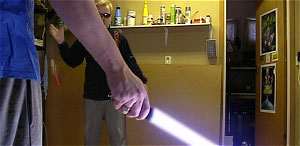
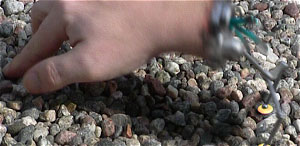
 In this shot I tried to use a difference matte to help me, but I still had to do a lot of manual masking anyway. To do this I made sure I had an empty shot of the background, and then I used the keying effect "Difference matte" on the "Good me" layer. However difference matting is notoriously inaccurate and motion blur is a horrible problem, so while it helped it certainly didn't give me a final mask to use. I had to mask away some edge junk around my arm, and ADD some pixels inside the arm itself since my skin tone was too close to the wall color. Oopsie.
What is funny is that the apparent "interative light" on my hand from the lightsaber is a pure fluke, and is a totally unplanned reflex of sunshine shining on my garage floor!
Lightsabers where created by using a solid layer and an animated mask, and applying the glow filter. here is the effects setting for the blue saber (apply to a white solid masked with 2-3 pixel feather) and here the red sabers settings. Most often the saber layers were in "Add" mode, which I like because it gives a hotter feeling glow... a lot of people use "Screen" transfer mode for their sabers but frankly I feel it makes weak and impotent sabers. I am about to write my own transfer mode "ScrAdd", a combination between Screen and Add which will be perfect for this. Stay tuned.
Somtimes instead of using a solid, I used an actualy copy of the footage layer with the "Fill" effect to rotoscopy my sabers on. Why? Because rotoscoping in the footage window is much faster than in the compositino window because when in the footage window you can do region selections of the mask verticies and that helps a lot.
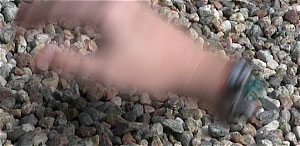
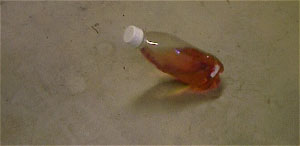
 - falling bottle -
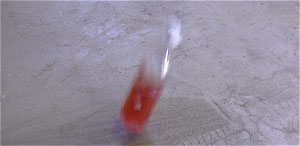
 By shooting this interlaced (I shoot everything progressive since my camera, a Canon "Optura Pi" has canons only instance of 100% genuine progressive scan, although it's a single CCD camera) I can timestretch it 200% in AE and it will separate the fields so you can get a totally smooth half-speed slow-mo.
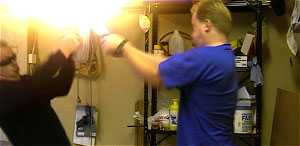
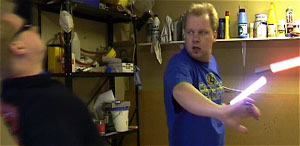
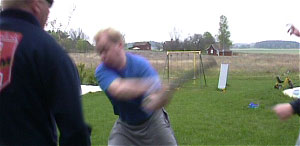
 - charging forward -
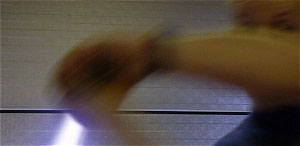
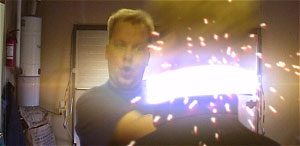
To make the speed of the saber movements look more real I added a carefully animated directional blur to the saber layer.
Also note that all these shots are shot in 4:3 mode with a stationary camera on a tripod, and then cropped to a "widescreen" look in AE later... this gives the freedom of vertical panning within the shot, adding life and "faux camera move's" to the shots.
 -- decapitation 1 -
This shot is only a few frames, and if you look at them single-stepping you see all sorts of artifacts on my arms. This was done with raw difference matting and no manual masking on top, and I considered it so breif that I didn't fix it.
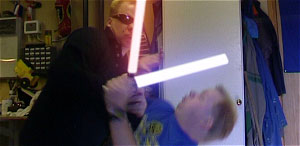
 -- decapitation 2 -
Basic cloning as before (i.e. animated masks possibly aided w. difference matting) but the head of "bad me" was put on a separate layer. Directional blur on the saber to give it speed.
As the saber hits, some of MacGyver635's nice saber contact flashes was used, plus a clip of myself welding in a darkened garage for the sparks. The head layer was animated flyi'n off screen to the right, and motion blur took care of covering up any mishaps with bad edges :-)
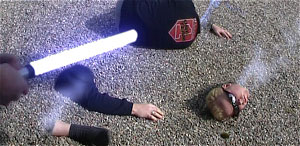
 -- decapitation 3 -
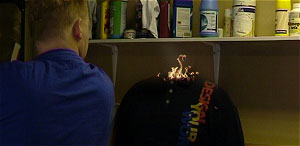
Back to this angle and the head is simply taken out by masking in some background. The same weld-sparks as before used and a stock clip of fire was added. Since "Bad me" was actually moving/wiggling a little I had to motion-track the position of the fire to a letter off my black shirt.
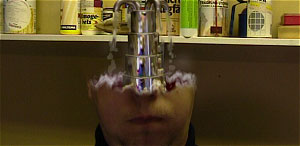
 -- face rebuild 1 -
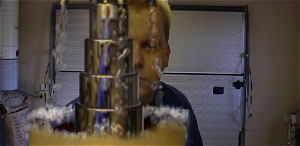
 A blurred version of the same fire footage in lower frame, and some light smoke created with the "Particle Playground" plugin. Entering the frame from the bottom is a 3D object created in 3D studio, the "face rebuilding faucet" or whachamacallit. :-)
This obect was rendered to several layers, one for the object and one for the streams of fluid, using a free "Normal map" plugin which colors the object based on the normal vector direction... this was used for distorsion/refraction in the fluid. The chrome in the 3D obect is based off a picture of a reflective sphere and the chrome map plugin. Funnily you can actually see the reflection of me taking that picture reflecting in the object itself, I happened to have the "good me" clothes on and the blue reflection you see is actually me taking the reflection pic. :-)
The fluid layer was created with help of the distorsion map plugin in AE. By matting out a blurred copy of the background from the alpha of the fluid, and applying the normal map as a distorsion map to it, fairly realistic refraction was created. The fluid itself was a particle system in 3D Studio that was using the "metaparticles" type to make the blobby liquid.
Unfortunatly this type of particle system doesnt generate proper motion blur and I am therefore not quite satisfied with the "stroby" looking motion of the fluid since it isn't motion blurred properly. I tried to cover this up slightly with some directional blur in AE but it doesn't help the edges being mostly sharp.
As the "regrowing head" enters bottom frame, that's just an animated mask over a still of the back of my head. But on top of that I've thrown some distorsion effects.... well quite a few actually... there are wave warps and ripples galor criscrossing this area to make it bubble and wiggle about.
Soundwise, this was fun. The sound of the "rebuild" is a mix of me pouring soda into a glass, me squishing banana between my teeth and... this was funny... when opening the plastic soda bottle to pour into the glass, I guess some person in my house previously used the particular bottle as a maracas or something, coz instead of unscrewing the corc to pour the drink, I got a pschssshht--spurt-gurgle-drip-on-the-floor-mess. LUCKILY the mic was running, and yes, this totally unplanned sound is the main element of the "rebuild" sound effect.
 -- face rebuild 2 -
 it just a reverse angle using the same techniques as shot #1 but using a different reflective map for the rendering of the "regrowh faucet", amusingly still with a blue reflection of me taking the picture in them... which makes a lot more sense from this angle since I am actually standing there with blue clothes on this time. :-)
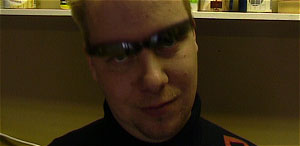
 -- face rebuild 3 and sunglass effect --
is just a closeup of same, but it's finished off w. the "magically unfolding sunglasses" gag, which simply is a freezeframe of my face plus a masked out pair of sunglasses which gets revealed in an interesting manner with an animated mask.
One key thing I learned here is that when a motion of a mask edge should be perceived as fast, the mask edge MUST be blurred. Some roto apps such as Commotion do this automatically but AE does not... so to make the appearance to appear (pun!?) to be quick, I had to make one mask for the horizontal top of the sunglasses and a separate HEAVILY feathered subtraction mask that I animated moving to the right, making the reveal from left-to-right over just a few frames, but the actual direction of reveal appearing "motion blurred" as if it was snapping in place from some unseen place.
 An idententical technique was used for the actual glasses "folding" out of the horizontal piece, to make it appear
blurred in the reveal direction.
An idententical technique was used for the actual glasses "folding" out of the horizontal piece, to make it appear
blurred in the reveal direction.
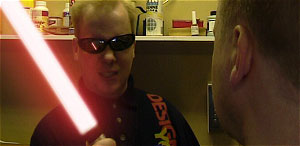 -- red saber reveal --
Cloning as before. The red lightsabre works as the blue one. One tricky shot here is the reflection of the red saber in the sunglasses. This was acheived by making a copy of the saber layer and tracking it's insertion point to the middle of the sunglasses with the motion tracker, with some manual tweaks to move it into the actual eye, a few frames in one eye, a few frames in the other.
Also a light red solid masked with a very blurred mask was lightly added to the left side of the face for some faux red light from the saber.
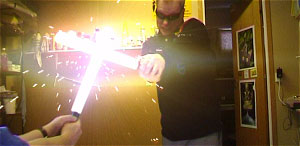
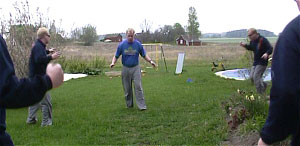
 -- combat time - first saber hit --
Now, how did I acheive the timing and positioning of the saber hits? By wire! I strung thin wire up across the garage I shot in and put teensy weensy bits of tape on it. I planned to do the fighting to music or sound fx loops to get the timing "right" but I actually did it with my own sense of rythm, doing a "one-two----three" hit sequence on a few pieces of tape, quickly re-dressing into the other clothes (by donning and doffing black shirt and sunglasses) and with timing in fresh memory hit the same markers from the other side. In quite a few shots you can still see my wires. Where it was super-duper evident I tried some wire removal but in most shots they are hard enough to make out not to be worried about.
 -- more combat --
I did each side several times, and layerd each clip on top of eachother in AE with "Screen" transfer mode (which allows you to clearly see both clips), and by trying out the various "good side" moves vs. the various "bad side" moves, there was bound to be some that worked. In some cases more than one combination worked, so if you see a camera angle re-appear it was because more than one combination of moves "worked" well together.
 What is funny is, that when I did this sequence I was oblivious to the existance of "Time Remapping" In AE. Had I known
about this feature, I would quite probably have found a lot more combinations that "worked" with the help of a little
time-stretching.. maybe... but then again I did try some "cut out a frame" here and there to "fix" those that didnt work
and the jumpiness made it unnatural, so maybe it was best I didn't drown in frame-blending-time-remapping messes at this
early stage in the game....
What is funny is, that when I did this sequence I was oblivious to the existance of "Time Remapping" In AE. Had I known
about this feature, I would quite probably have found a lot more combinations that "worked" with the help of a little
time-stretching.. maybe... but then again I did try some "cut out a frame" here and there to "fix" those that didnt work
and the jumpiness made it unnatural, so maybe it was best I didn't drown in frame-blending-time-remapping messes at this
early stage in the game....
 -- close contact --
A very very tricky shot, but I am very very happy with the result. Masking of wildly waving (and highly motion blurred) body parts in multiple layers is a slow and painful task, but rewarding. In this shot there are a lot of layers on top of each other all containing a piece of the good and bad copies of me in proper "3D order". It's goodie's right arm behind baddies two hands behind goodie's left arm and lightsaber, while goodie's right hand then makes contact with baddie's face - smack - and throws him outta frame. And there is a few layers of feathered dark solids so baddie casts a shadow on goodie and so on. *phew*
There is also some questionable physics in, how did baddies left arm go from being in front of goodies right to be behind it? COULD work but if you frame-step it you see it's probably a squeeze to do. *heh*
 -- blam blam --
When baddie gets facewhacked he gets mean and sparks fly.... this is just same old stuff as before but with the addition of short clips of me welding in the dark in the garage thrown in. Real sparks... beats particle systems any day....
...actually that's a general advice... if you CAN shoot something practically... do!
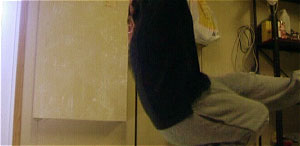
 -- falldown --
For those who know the layout of my garage this is a major continuity flaw since I am actually falling down in the completely opposite end of the garage from where I was in the previous shot, I am actually falling BEHIND where the baddie me was in the previous shot. Heh.
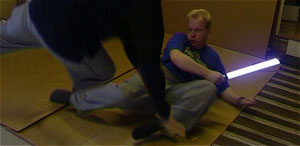 -- leg sweep --
One of the really painful shots to do.... a motion blurred body falling with waving arms in front of another motion blurred person, while all casting wild and wierd soft-shadows left right and center. This was done with a lot of layers of masks, and for the shadow-areas bits were masked out in "Darken" mode so both clone's shadows would blend properly. Funnily most of the hard work on the shadows are actually cropped out by the widescreening but oh well... *grin*
The actual leg-sweeping-away-the-other-leg is a nasty perspective fake.... when "baddie me" does the fall, I actually fold my leg under myself, but when I did the masking, I actually allowed the sweeping leg to be in front of the baddie leg making it look as if I am sweeping that leg away tripping myself most severely! As you notice as baddies body passes goodies body, one would expect baddies right leg to be on top of goodies leg, having been swept away by it, but it aint there... coz it's in reality under baddie...
 -- get up --
Sorry I look into the camera - unelegant there. Yuk.
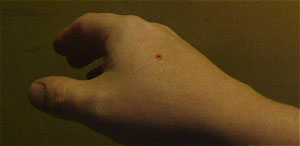 -- blood --
The bloodstain was a drop of ketchup, but it didn't come out at all on camera... so I tracked a red solid over it set to some exotic transfer mode to make it look more like a drop of blood. And for those who say "why so little blood" well, that's the joke innit? Getting so pissed for a single drop?
 -- more fighting --
A few shots being more of the same, with the last one actually being done WITHOUT any wires being put up... you sorta
can tell coz the sabers kinda go through eachother a bit there....
 -- kepunch 1 --
I flubbed this shot, and there while I did both falling and punching umpteen times, not a single one of them actually lined up so I would punch myself in the face.
 -- kepunch 2 --
In this side shot was the only place I managed to put my hand in the right place (and I still did like 20 takes putting my hand in various positions - getting these little interaction-posistions right without any physical reference is *hard*) hence the short short short cut of the sideview in the punch
 -- kepunch 1b --
...so by skipping the bad actual punch going back to this shot for the nice floaty fall-backwards thing (all done with simple 50% de-interlace slowmotion as mentioned before and me "faking" that it's actually slower than it is).
The baddies lightsaber is a CGI saber added in 3D Studio. One trick used the 3D studio feature to render in passes, and putting a pure white refraction map on the blade of the saber, and rending "refractions" to a separate file. Then voila, I had a white object onto which to add the same effects I would normally add on a masked hand-rotoed saber, to make my CGI saber completely identical in "look" to the other sabers with no effort. God I'm clever *grin*
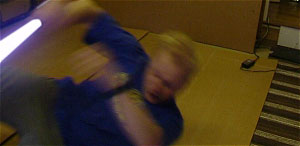
 -- falli'n --
This I had to re-shoot at least 3 times. And I mean 3 completely different days, after failing to get it "right" the other times. Remember I am doing this *all by myself* with nobody manning the camera, or anything. So I can't "see" if it was a "good take" or not. I have to go on feel. In most cases that worked fine, but hurling a body through the air was something I apparently could not intuitively "feel" if it turned out right or not. To my defense I must also say I was kinda scared to throw myself on the concrete floor, and that I had limited timespans to shoot this anyway....
Funnily, one of the days shots was mostly rejected due to my extremely bad hair that day *grin* .. but also coz I just didn't fall right. But 3rd time's a charm, right?
So I put pillows all over the floor, raiding all the garden chairs and the kids beds for madresses (shh, dont tell my wife!) and climbed up on a small ladder and hurled myself backwards. I set camera shutter to 1/4000 or so to get as sharp images as possible, and shot in interlaced mode to get 50 "semi-frames" of raw framerate.
Then I put the interlaced footage into AE and streched it 200% and rendered that out to a "half-speed" file with progressive frames. I THEN plugged THAT footage into DynaPels "MotionPerfect", a pretty nifty, very cheap, but somewhat temperamental and very un-customizable app (basically, you have NO settigns for anything, just say "stretch this footage so much" and hope for the best. Sometimes its great, sometimes its so-so...).
 I then put THIS now 10 times slowed down footage into AE and played with time-remapping and frame blending... the
first part of the fall is the raw output of MotionPerfect (and the wierd distorsions around my legs are the kind of
stuff you get out of MotionPerfect... I could have masked it out using an empty background plate but one has only
so much strength, and it looks kinda neat in a matrixy-sorta way anyway, most people prolly thinks it's an effect
anyway *grin*) and the second half is the stuff sped up basically to original speed in AE. But note how the frame
blending now *creates* that motion blur that wasn't there due to the shutter time, so while the first half is
sharp, the second half is properly motion blurred! Nifty huh?
I then put THIS now 10 times slowed down footage into AE and played with time-remapping and frame blending... the
first part of the fall is the raw output of MotionPerfect (and the wierd distorsions around my legs are the kind of
stuff you get out of MotionPerfect... I could have masked it out using an empty background plate but one has only
so much strength, and it looks kinda neat in a matrixy-sorta way anyway, most people prolly thinks it's an effect
anyway *grin*) and the second half is the stuff sped up basically to original speed in AE. But note how the frame
blending now *creates* that motion blur that wasn't there due to the shutter time, so while the first half is
sharp, the second half is properly motion blurred! Nifty huh?
 -- fallin 2 --
I am not an athlete, okay? I'm a fat ugly Swedish guy doing software engineering for the most of my life and I hate sports. Now I really tried to actually roll on the floor and roll completely over but I was too chicken, fat, or whatever to actually do it. It's funny this shot in the actual footage looks completley lame but some judicious time-remapping make it look pretty cool, especially since it becomes a follow-through of the previous shot.
 -- getting up --
Intercut with a snippet of "kepunch 1b" and putting the actual flipover into the sound-effect track instead *grin* I here excercise what little muscle I have and jump up, again slightly time-remapped. Come on. Not everybody can be Woo Ping, okay!?!?! It's my little tribute to Ryan W's jump in RvD. *grin*
 -- saber throw --
One of my favourite shots. It's made up of three different filmed shots
- a) Good Me pretending to throw and catch a saber, shot on a completely still tripod
- b) Bad Me pretending to get hit in the head w. a thrown saber in the other end of the garage, shot on a completely still tripod shot.
- c) Me behind the camera panning from positinon a to b and back to a in about the right timing for the throw.
 Then I tracked shot c in Icarus, and dropped in shots a and b as 3D layers in the end position of the pan. The same
camera data was dropped into 3D Studio and a CGI saber was created. With motion blur applied to the 3D layers
it completely blends into the background layers original blur..... Whoosh splat whoosh catch!
Then I tracked shot c in Icarus, and dropped in shots a and b as 3D layers in the end position of the pan. The same
camera data was dropped into 3D Studio and a CGI saber was created. With motion blur applied to the 3D layers
it completely blends into the background layers original blur..... Whoosh splat whoosh catch!
 -- crash the door 1 --
First I throw myself against the door, then I opened the door and threw myself out the open door. A lot of masking and some bad looking particle-sparks later I have a passable "crash out the door" shot.... the shot was unfortunatly overexposed and a lot of other problems with it (like, how I hold my arms) but it's brief enough and covered up with enough sparks and crap for this not to be too noticable. I tried to re-shoot it but flubbed it in forgetting to shoot an empty background shot with the door *closed* so I couldn't get it to work, so I used my original attempt.
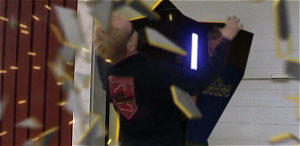 -- crash the door 2 --
This was also first shot overexposed but in this case I could use my re-shoot. First I (dressed as baddie me) throw myself away from the CLOSED door, then I OPEN the door and dressed as goodie me jump after.
The AE shatter effect was used to make the pieces of the door, and the sparks are also particle playground sparks. I tried to cover up the fact that "Shatter" has no motion blur with my own "faking out of focus" blur plus some directional blur centered on the sorta-center of the "explosion". Some light, glow, particles and junk later to cover up most flaws and it's pretty okay shot.
One last-minute idea was to do a "terminator tribute" in the glowing edges of the broken door slowly going from yellow through orange to red as they "cool of".
 -- hack and slash --
Just me waving the vacuum-cleaner tube at the camera with some sparks added. One nifty thing is this: When I shot my stock footage for those weld-sparks I've mentioned numerous times before, I actually made a major mistake and shot first a series of weld-sparks COMPLETELY out-of-focus. Since this shot was meant to have the sparks out-of-focus anyway due to their closeness to the camera, it's the first (and so far only) time I had any use for my out-of-focus-sparks footage!!
 -- chopped hand --
The chopped clip is a masked out bit of the "walking hand" clip (below) on top of the background plate for the walking hand clip, with a faux shadow added with a soft mask and some motion blur. It fit nicely in with the fact that the little burned-off wires in the hand had the Flex modifier on them (in 3D studio) and actually started their first few frames by wiggling into their "resting position".
 -- hack and slash b --
The smoke that rises at the end is shot separatly by shooting some burning inscence(sp!?) against a black suitcase and screening it on later, slowed down to half-speed (again, shot interlaced and then slowed down to 25 progressive frames).
 -- smithereens --
 I marked out a few spots in the gravel for where the various pieces would go, and then simply lay down in a bunch of fairly uncomfortable position to get the various shots, plus an empty background. Then I masked out the various bits and pieces of "baddie me". In some cases a small black solid with a feathered mask needed to be added under it to make the shadow look correct.
The smoke added on top of it is just Particle Playground smoke, except the furthest smoke which is shot burning incense.
On top of all this I masked and layered "goodie me" moving away with his lightsaber.
 -- saber de-gnition --
I animated a highly feathered subtraction mask over the normal mask for my saber blade (see the sunglasses clip for explanation on how the feathered subtraction mask simulates motion blur), but I also had to mask in a piece of empty background to cover up the vaccuum cleaner pipe I was using as a "lighsaber prop".
 -- walking hand --
I simply shot my hand on the gravel, lifed it up and started "walk out of frame" with my fingers. Then by using animated masks I cut off the wrist (with a fairly sharp mask) and the shadow of the arm (with a very very soft mask), and replaced with the background gravel.
Then I loaded this as a background into 3D studio, and hand-animated, frame by frame, so the "robotic stump" would follow the movments of the wrist. By using the "Shadow/Matte" material as part of a "Blend material" I was able to make that funky transition from the chrome stump to real hand in an interesting way.
A ground-plane was also added using the "Shadow/Matte" material (this material is used for allowing 3d objects to cast shadows on the 'background' or to allow 3d obects to appear as being part of the background plate but yet being "in front of" (and covering) the other 3d objects in the scene..) so the little robo-legs could cast some shadows on that.
I rendered the obect without background and with an alpha channel, plus the shadows to a separate file. Loading up the obect on top of my "hand ending in the wrist" I had the basic robot stump. By some careful masking the shadow layer was "joined" with my preexisting shadow so it wouldn't "double-shade" and make too dark shadows, yet semi-clearly show that the feet indeed cast shadows. (Nothing "grounds" stuff as well in reality as proper shadows, especially "contact shadows", which my own Occlusion plugin does nicely, *plug plug* :-) )
The smoke coming from the hand stump is Particle Playground smoke, hand tracked later in AE to follow the hand. One would argue I could have added smoke directly as particles in 3D studio, but I felt I had a bit more control this way... notice how the smoke actually wiggles a little in "reaction" to the "wind" caused by the legs unfolding.
Subtle but nice. *grin*
 -- looking scared --
I am totally aware that I "forgot" to add the hole in the door to this shot. I just didnt have the strength. So sue me. I also forgot to shoot the open door....
 -- reassembly pan --
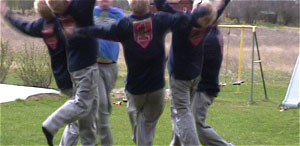
I am very pleased with the fact that this shot worked as well as it did: A 120-ish degree pan over 5 clones of the same person, all in full motion video, back and forth (the whole pan shot is complete and the cut in the middle is for dramatic, not tecnical, reasons).
How was this done? The idea is simple, really. Assuming you rotate your camera around it's focal point (i.e. normal "panning" and "tilting", while not EXACTLY around the precice focal point of the camera, often close enough to "work") allows you to use shots taken from the same location but with a *fixed* camera as 3D layers, and the whole perspective thingy will work out. See here for details.
So I shot myself standing in 5 positions, and then shot a camera panning from the first to last to first. I then tracked the panning shot in Icarus, and loaded into AE as keyframes for a 3D AE camera.
I then moved the time slider so my camera was pointed at (roughtly) the same angle as where I shot myself in position #1. I dropped in this shot as a new layer and made the layer 3D. Then I looked at the cameras "point of interest" and copied this value to the "position" attribute of my new 3D layer. Then I hand-rotated the layer to face the camera and adjusted it's size to completely fill the frame, and finally tweaked the positions slightly. (Having the layer temporarily in "Screen" mode to allow me see both the layer and the background at the same time helped immensly). When I had a match, I could move the time slider, and to my glorious satistfaction see my new 3d layer merrily follow the background in the pan, with nearly 100% correct and accurate perspective distorsions to boot!
 Since this clip is supposed to show you that each of the 5 pieces I chop the robot into now grows a complete robot,
I added some animated endoskeltons I had sort-of (not very accuratly) matched to a few clones footage in 3D studio, and
via some animated masks allow a "reveal" of both endoskeleton and clone, implying more "regrowth". Redubbing the "pscht"
sound effect was supposed to help too... however some people don't seem to "get" this shot and had I had infinite time
I would surely add more clips to this section to make it more clear whats going on.
Since this clip is supposed to show you that each of the 5 pieces I chop the robot into now grows a complete robot,
I added some animated endoskeltons I had sort-of (not very accuratly) matched to a few clones footage in 3D studio, and
via some animated masks allow a "reveal" of both endoskeleton and clone, implying more "regrowth". Redubbing the "pscht"
sound effect was supposed to help too... however some people don't seem to "get" this shot and had I had infinite time
I would surely add more clips to this section to make it more clear whats going on.
Funny thing is, after doing this clip, I realized that I really didn't need the panning clip... as long as I had enough imagery to cover the entire angle range, I could actually throw away the "real" pan and do any panning completely virtually inside AE. This revelation/idea led to the "iron rod camera pan" clip (see below).
 -- run like a girl and get chased --
There is one unobvious effect in this shot, and it's the fact that I had to remove the lightsaber pipe I was holding
while running (if you can call that running, har har) away, for continuitys sake.
 Other than that some rather simple animated masks for the clones entering frame left. Biggest problem here was that
darned fence door was waving a bit in the breeze and gave me a headache.
Other than that some rather simple animated masks for the clones entering frame left. Biggest problem here was that
darned fence door was waving a bit in the breeze and gave me a headache.
 -- the big smack --
This shot was one of the hardest to do. Here's why:
Due to the amount of overlap between all the clones, and there is a *lot* of overlap, I tried to get as much of it as I possibly could via difference matting. So I put an empty background frame in a layer to use as a difference matte.
The problem is, the wind was blowing when the shot was done... the swings were swinging, grass was blowing, meaning, the difference matte made a very approximate result. I set up so it would err on the side of "include too much", so with the pure difference matting each clone got this little green rim of grass around it, and was spraying all sort of random dots of garbage around the environment where little background things were moving.
After a few painful days of trying to cover up stuff with masks, I discovered a feature of AE I didn't notice before: The "Effect->Paint->Vector Paint" has a fantastic feature called "In Original Alpha Only" which allows you to paint in the alpha channel layer, and both add and remove transparency! With my Wacom pressure sensitive tablet attached this was a pure dream to work with. Or so I thought.
After some painful times I noticed that painting the alpha frame by frame was harder than I thought. It was okay for fast-moving things, but slow moving objects had to be carfully be painted correctly or the "flickery edge" of the painting being different from frame-to-frame was very very very evident. So I basically had to start from scratch a few times before it looked okay.
So I had the sequence done... or so I thought.
The thing is, this was all shot interlaced, so I could do a nice smooth "half speed slow mo" on it for the punch. But to my total pain and agony, slowing it down to halfspeed made my whole comp explode into a mess of blinking pixels.
Why? Well, it was shot interlaced, but I was working on it in a frame by frame fashion. Being interpreted in AE as "lower field first" I was only working with 50% of the fields. And the difference matting was working with a single field of the background frame.
 When I turned on the slow motion I got the most fantastic mess. First of all, only the lower fields were alpha
painted at all.... but the difference matting was now matching the wrong field to the background, and the matches
were completely different... things that had not generated a difference matte before suddenly was.. edges, grass,
etc. It was a glorious disaster to watch. Time to smack your head to the desk and rethink.
When I turned on the slow motion I got the most fantastic mess. First of all, only the lower fields were alpha
painted at all.... but the difference matting was now matching the wrong field to the background, and the matches
were completely different... things that had not generated a difference matte before suddenly was.. edges, grass,
etc. It was a glorious disaster to watch. Time to smack your head to the desk and rethink.
Luckily, the authors of AE had their brains on. (One wonders if they really were from Adobe :-) so by changing the framerate of my comp from 25 fps to 50 fps, it still associated my old painted frames with the old time-positions (I was really worried it would be dumb and just count frames and move all my days of paint work around - but it didn't, prais da laawwwd)... so I could paint the in-between frames, and cover up / fix the ugly blinking junk by painting out the alpha of the garbage. It took a SERIOUS while, but ended up pretty good.
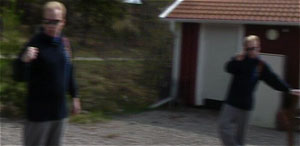
 -- iron rod camera pan fight --
Taking in all the lessons learned from my cloning-with-moving-camera tricks done previously, I attempted this shot and I am very happy with the result.
Basically, I acted out the "goodie me" with a fixed camera making sure no action went out-of-frame, redressed to "baddie me" and at first acted out the "baddie me" parts in front of the same fixed camera position - all of them, in case my panning idea below wouldn't work. Getting the positions right for the "kick" and the "punch" was hard, as usual, but since the rest of the interaction was going to be via an iron rod, it didn't need to be as exact, since I could animated the rod in any way I choose. Also, people keep askign me how to get the timing right, but they forget that I actually only interact with each clone once... and hence the timing is completely fixable afterwards in AE by just sliding the layers around until the hits match. Easy, really.
Then I turned the camera about 20 degrees to the right, an re-acted the "baddie me" attacks from the right again.
I loaded all this into AE and tried to match things up. For the shots shot in the same position, it was mostly a matter of finding those who worked in position and feel. I made all layers 3D layers and created a camera. I copied the settings from the camera I had gotten from the Icarus for my earlier shots, since I was using the same zoom setting on the camera (max wideangle).
I then put in the "20 degrees moved" shots in, and turned them about 20 degrees back aroudn the Y axis, and slid them around until I got the perspectives to match (again, see my other page for details).
Okay, now I had a bunch of layers posed at two different positions in 3D space and each turned at an angle to eachother to undo the perspective distorsions of the camera filming them. I could now animate the "point of interest" of my *virtual* camera in any way I choose, as long as I didn't go outside the bounds of the area covered by the two angles and pan as I wanted. Virtual Cinematography on a shoestring budget, so to speak.
Funnily, though, none of my shots in the "20 degrees panned" position actually matched my punch, but one of the "camera straight" shots did... thats why the camera doesn't pan until after that clone drops out of frame. If you look carefully you will actually see that I *fade* that clone out for the last few frames to allow me to start panning without the edge of that clip becoming visible.
Also funny was that since "goodie me" was doing that wierd twirl at the end and I had some extra shots of clones that didn't match that punch coming in from the right, I dropped one of those shots in, hoping I could add in an extra throw of the rod there. This was not planned, and is why that whole throw thing looks a bit suspicious.
Since I was acting out using a metal rod to punch around, I had to create one. I layered the shots I had in 50% transparent mode so I could see them all at once (I hadn't start masking stuff out yet) and saved this as an .AVI file.
In 3D studio I loaded up this .AVI as a background, and animated a stick more or less frame by frame (by hand) to match the position of how I was moving my hands and how the clones got hit by it, and rendered it out as an .AVI with alpha channel (without the background).
I then dropped this .AVI into my comp in AE and did some animated masking of the stick to the bits where my hands (or a clone or whatever) would cover it up.
Adding some soundeffects I aqquired by going outside, finding an iron pipe, and banging it into the ground, myself, and various other things, layered with some "punch" sounds I found online, we had a pretty nifty fight sequence.
 -- smokey head stand up --
One would think the only effect in this clip is the light smoke I added to show that this clone was somewhat broken. Thats completely wrong. Actually the smoke is more there to cover up the actual effect than to add any sense of broken-ness: I looked into the camera in a very very very ugly fashion. So I masked out my head from a frame before I started to make the ugly look, tracked it to the position of my shoulder until it again matched the position my head had AFTER the ugly look... then I took the head from the position AFTEr the ugly look and reverse-tracked it in the same way.... then I crossfaded the two. It looks somewhat ugly and hence the smoke to cover it up. Heh.
 -- clones come back for more --
This was actually a very easy shot to do. Firstly there is very little overlap between the clones. "Goodie me" and the two furthest clones could all be done with simple masks that didn't even need to be animated, a simple three-way-split was sufficient. I only needed to worry about the frontmost (nearest) clones for overlaps.
Here, I used a new trick: First I used difference-matting vs. an empty background to get a rough outline, as before, and in this case this worked almost as-is. There was only some ugly green around where the closest clones arms overlapped the next clones black shirt.
So what I did was this: I masked duplicated the clone layer and cut out these "trouble areas" with an animated mask, so they could be treated separately, and put these bits on with the "Darken" transfer mode instead of "Normal". Since it was a "black shirt on black shirt" situation, "Darken" worked perfectly, and the green (light) grass didn't affect the dark shirt behind it at all, since it was lighter. Very nice quick-fix for the problem - no massive paintwork or anything needed!
 -- bottle pull --
The bottle is pulled up with a wire which is then covered up with a piece of background from an empty frame. Problem here was, that during this short pull, the sun came out, totally changing the light on the floor... it was VERY obvious in post, so most of the work actually lays in animating some color-correctoin parameters to "undo" the very changing lighting!!!!
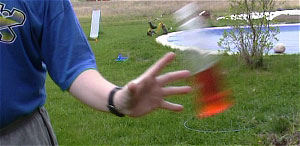
 -- bottle fly --
I am actually standing to the left of the garage door, with the door open, bottle on a wire and swinging it INTO the garage. Then I close the door and walk out of frame to give me an empty plate with the closed door on it.
I then reversed the footage, and using the empty plate covered up the wire and myself, plus made a jagged mask for the "hole" in the door. (There is also a little solid w. a mask to make the "edge" of the broken door).
 -- bottle catch --
A wire was used to make the bottle hover, and it was covered up with background w. an animated mask.
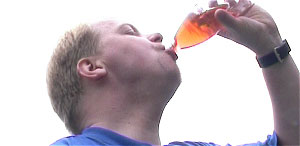 -- glug glug --
No effects here, although I considered for a while to add a red glow to all shots of the bottle, but in the end decided against it.
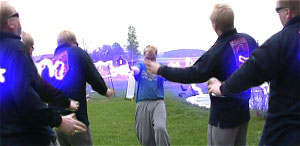
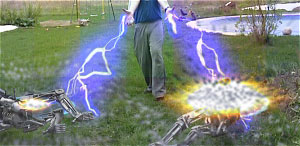
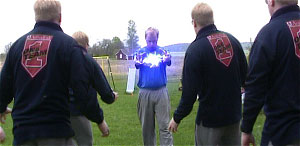 -- clone destruction --
This shot is fun in the sense that I was a bit sloppy in filming it... I needed each clone to stand for a while, and then get hit by lightning (doing the old "Raiders of the lost Ark" lighting punch through thing). However, on a few of the instances of the clone, I simply didn't stand long enough. Heck for the closest left clone I didnt stand more than a few frames.... so if you look closely to the left clone you will see it's a segment of some 10 frames just run back, forth, back and forth again during the "wait". Luckily, there is so much other movement and the image is completely set up to throw your focus on the "good me" in the middle so you don't really notice. Until now, when I tell you. *grin*
Amazingly, the cloning in this shot, although with quite a bit of overlap, was actually fairly easy to pull off... it was done using the same technique as the previous shot, i.e. a rough difference-matte w. the background, and then in the "problem areas" where dark overlapped dark, mask that out separately and throw the "Darken" transfer mode on it. Had I not been wearing black, this trick would not have worked! Lucky me *grin*
 As the lightning *starts* to form, I used "Effects->Paint->Vector Paint" and my trusty Wacom tablet w. pressure sensitive
stylus to draw the sparks frame-by-frame, and a couple of glow filters on top for the aura. This gave good control but
was hard to make look as if it was "flowing"... so a few frames into the lightning going "straight at" the clones, I
switch over to the AE Lightning filter.
As the lightning *starts* to form, I used "Effects->Paint->Vector Paint" and my trusty Wacom tablet w. pressure sensitive
stylus to draw the sparks frame-by-frame, and a couple of glow filters on top for the aura. This gave good control but
was hard to make look as if it was "flowing"... so a few frames into the lightning going "straight at" the clones, I
switch over to the AE Lightning filter.
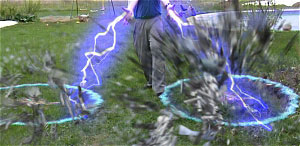
Since the AE lightning has no perspective, it was acheived by fiddline with some settings and then duplicating the lightning layer three times, and spreading out the end-point a bit for each bolt. This gives a faux-perspective feel.
I also tried to time everything so each clone "jerks" as lightning punches through it, in homage to Indiana Jones.
The instance the lightning stops, it goes back to painted (note that little spark dropping off at the end), and also the start of the second wave of lightning the first few frames are painted, the rest the lightning filter.
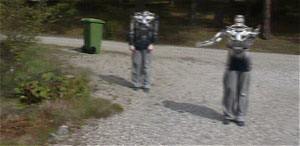
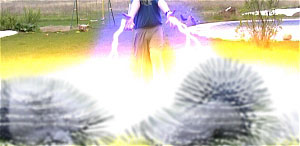 -- exploding clones --
The exploding clones are done in a couple of layers.
The first thing you see is the Particle Playground used as a "layer exploder" on top of a couple of contact flashes.
 But
just using this didn't look good enough, so after a few frames you can see a pair of chrome endoskeletons on the grass.
But
just using this didn't look good enough, so after a few frames you can see a pair of chrome endoskeletons on the grass.
 These are done in 3D studio by approximately posing the endoskeleton model like the bodies on the ground was posed, and
then these are blown up with the "Bomb" space warp modifier in 3D studio. Also a stock file of a blue "shokwave" is also
added. I do myself think this all lacks some smoke, but it turned out pretty neat anyway.
These are done in 3D studio by approximately posing the endoskeleton model like the bodies on the ground was posed, and
then these are blown up with the "Bomb" space warp modifier in 3D studio. Also a stock file of a blue "shokwave" is also
added. I do myself think this all lacks some smoke, but it turned out pretty neat anyway.
 It's funny that I look almost like "oh crap, I didn't know they would do THAT" in my reaction to the explosion.
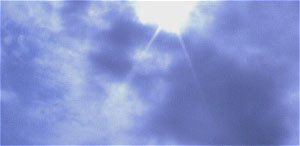 -- sun comes out --
This clip was necessary due to the wild difference in weather between this and the following clip... one was under a steely gray sky, the other under bright sunlight... to try to cover that up, I inserted this little "sun comes out of the clouds" clip, done 90% for real... i.e. on a cloudy day point camera at sky... wait... and wait... find a good segment... speed it up...... put on a wee bit of lensflare at the end of it... and smile.
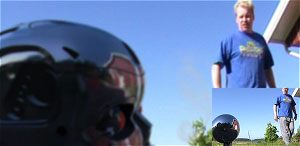 -- robot head 1 --
I'm pretty proud of how this turned out.
The practical shot is just of me walkign up to my little "christmas ornament" lightprobe (reflective sphere). Then, the imagery from this reflective sphere is thrown through my Chrome Mapping plugin and occluded with my Occlusion Map plugin (to be released later) - and that's it. No lightsources, no shading, no nothing.
 The "focus throw" and slight parallax on the subtle pan is all faked afterwards in AE by blurring the layers differently and
moving them ever so slightly in relation to eachother. The smoke is also from me burning insence, with the only difference
that instead of screening on the incense footage itself, I now used it as a track matte to a blueish-grayish solid, partially
to make the smoke a bit more colored, but partially to be able to put it in a precomp together with the skull so I could
move and blur them together.
The "focus throw" and slight parallax on the subtle pan is all faked afterwards in AE by blurring the layers differently and
moving them ever so slightly in relation to eachother. The smoke is also from me burning insence, with the only difference
that instead of screening on the incense footage itself, I now used it as a track matte to a blueish-grayish solid, partially
to make the smoke a bit more colored, but partially to be able to put it in a precomp together with the skull so I could
move and blur them together.
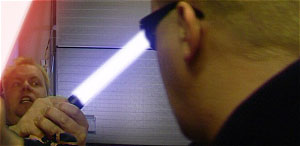
 -- robot head 2 --
I attached my "lightprobe" to the camera with a stick and some duct tape, and picked up the camera in very much the same way I then picked up the skull. This gave me a reflection map travelling from the ground (in the shade) to sunlight and up in the air.
I then put the camera on the tripod and tried to fake picking up something in approximately the same timing.
Then I loaded the second shot as a background into 3D studio, and the 1st shot through my Chrome Map as a reflection on the skull. I then animated the *angle* of the skull to turn in the way I was turning my hand, manually, in 3D studio. I didn't bother with the position - just the rough angle.
Rendering this skull out with an alpha channel, I loaded it in as a layer in AE. I then motion-tracked my thumb and attached this layer to the hand, letting AE handle all the *move* of the skulle while 3D studio had provided the 3D "rotation" of it. This allows the skull to follow my wiggly hand nicely, much better then I could hope to track it in 3D studio, and much more easily tweakable and more interactive too.
A little animated mask for my thumb, and voila, instant Hamlet!
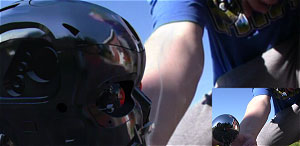
 -- robot head 3 --
Again attaching my lightprobe w. ducttape to the camera, and now picking up the camera pointing towards myself, and then rendering the skull from a fixed angle and position with the animated reflections on it... then tracking the skull movement to my hand movement (you can't actually see my hand in the film coz it is outside the cropped frame, but it's there in the footage).
A problem in this shot was that my camera seems to have a "star cross" filter built in... notice in the raw lightprobe image that the sun is a nifty little "star cross". However when this gets thrown onto the skull as a reflection map it makes strange lines on it.... to try to cover that up, and to marry the skull more into the scene, I tracked a standard AE lens flare on top of the sun reflection in the skull.
 -- robot head 4 --
Similar to robot head 3 with the difference that the camera is fixed, but the lightprobe is in my hand. This added the additional layer of complexity that I had to motion track the lightprobe, and render out a separate movie where the lightprobe was stabilized to the center of the frame, so I could use it as an animated reflection in my Chrome Map plugin. As before, only the rough rotations of the skull was actually rendered in 3D and all the "movement" was added in AE, with the exception of the movements for the throw, which were done in 3D.
 -- skull throw --
While mostly only the rotations were done in the 3D scene, I ended it with the skull flying away from the camera and
spinning, roughly following a throw. The exact positions of this was later tweaked in AE, and the shadow of the skull
on the wall is just hand-faked with a blurred zero-brightness copy of the footage set to darken mode.
 The explosion
is just a lame stock-explosion thrown in in "Screen" mode, masked slightly for the edge of the roof and my face.
The explosion
is just a lame stock-explosion thrown in in "Screen" mode, masked slightly for the edge of the roof and my face.
 -- matrix vs. harry potter flyoff --
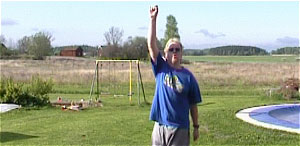
Yeah, I say, "wingardium lederhosa", a wierd matrix/harry potter reference if anything, since "lederhosa" means "leather pants", literally. Ha ha, aint I funny? *giggle*
This was simply a shot of me jumping in the air, then walking to the camera and whipping it into the sky, and by cutting the last frame of my jump out and slapping it on a 3D layer that is animated to move away from the camera and tilt a bit, while being shown on top of the real-camera-whips-into-the-sky, it looks as I fly off.
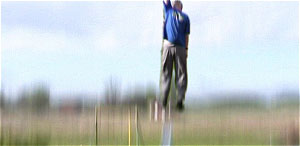 No fancy motion tracking or anything was done for this shot - strictly low-tech stuff.